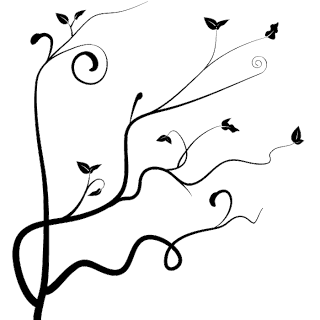
I was looking for something to blog about and found another illustrator tutorial. I thought it was really cool.
I really liked the tutorial because of the curves and twirls in it. In the tutorial I also learned how to make custom brushes and symbols, which is surprisingly simple; all you have to do is make the shape or brush stroke you want, then drag it into the brushes or symbols palette, then adjust the settings for it.
So first you should start off with a curvy line, drawn with the pen tool or the brush or pencil tool (whatever you prefer).
Here is where you make one of the custom brushes. Use the pen tool or the triangle tool to make a shape like this:

For the settings to put for the new brush, go to the tutorial (Step 3).
So now that you have the brush, click on the curve you made and apply the brush.
Next you can apply another branch/vine; make the stroke size smaller (like the varying sizes in my picture below).
Now use the pen tool to make some leaf shapes (like the ones in the picture below), and keep them relatively small. Now drag them into the symbols palette, name the leaves something that makes sense, and make sure you click "graphic" rather than "Movie clip."
 For some of the other vines, you have to make another brush; make it look something like this:
Follow the same directions for the first custom brush. On one of the branches, use the pen tool to make a small arc, then apply the brush to it.

Next is the part where you can be creative, just keep making swirls and branches until you're satisfied with what you've got.
I really like my final product, and I'm probably going to use if for things like backgrounds and websites.
In the rest of the tutorial, it switches the image into Photoshop and makes a cool background, check it out if you wanna see:)
I hope that was helpful:)
No comments:
Post a Comment